Share
Pin
Tweet
Send
Share
Send
To make such an album, we need to take:
- Binding cardboard 20 by 20 cm two sheets;
- Cotton Korean fabric soft pink with flowers;
- Sheets for an album from a set with a teddy bear printed on a color printer (you can buy such a set from designers on the Internet and then print it), we take 60 pages with a size of 19.5 by 19.5 cm from us, we then glue them in pairs and sew;
- Picture with teddy bear;
- Synthetic winterizer;
- Scrapbook paper pale pink sheets 30 to 30 cm, take two sheets;
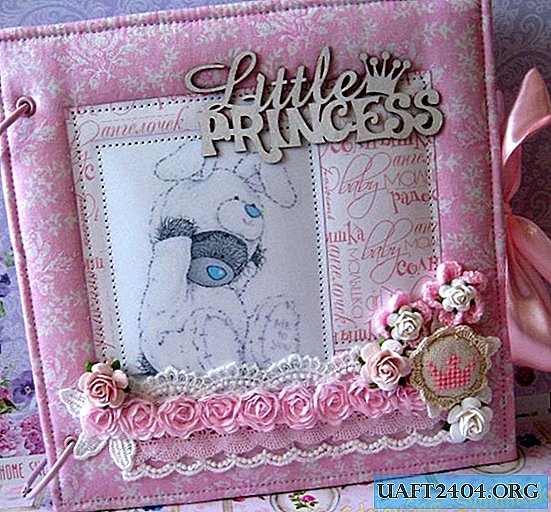
- Chipboard "Little Princess";
- Wide white chiffon lace;
- Cotton pink lace;
- Chiffon pale pink roses on a ribbon;
- Knitted chip with a pink crown;
- Paper roses are white and pale pink;
- Knitted pink flowers;
- Rings metal pink color with a diameter of 40 mm;
- White embroidered flowers;
- Eyelets light pink and installer for eyelets;
- Satin ribbon light pink 20 mm wide;
- Ruler, scissors, glue stick, adhesive with the effect of adhesive tape;
- A simple pencil and a lighter, double-sided tape.

We take binding squares, glue strips of double-sided tape on them.


We glue the synthetic winterizer, now we take the fabric and cut off two squares, just make a stock, about 24 by 24 cm.


We smooth the fabric thoroughly.


Now we need to fit the binding squares with cloth. First we smear the corners, wrap them.


We wrap both squares, pull them well, but at the same time we don’t pull them.


Glue tape cuts from the inside of both squares.


We flash them on a typewriter around the edge. Now we cut out two squares of 19.5 by 19.5 cm from scrapbook paper.


This will be our inner bookends for decoration. Now we need to sew paper and a picture on the front of the album. Cut scrapbook paper 11 by 14.5 cm, picture 9 * 11 cm.


Sew paper and a picture.


Now glue the flyleafs inward. We put it under the press. Meanwhile, we can do leaflets for now. Glue them in pairs and then sew them on a typewriter.


Now we need to put the grommets on the covers at the same distance. We put it on the cover first, and then transfer it to the sheets.


We collect the album into rings and glue the chipboard.


Now we decorate our cover with the most delicate decor, which will add to our album a marshmallow-lush look. We get here such a ready-made album for your baby. Grateful for your attention and good luck to everyone!


Share
Pin
Tweet
Send
Share
Send

